How-To Guide · 2026
How to Clean a Mini Split: DIY Guide for Wall-Mounted Units
Learning how to clean a mini split the right way protects your investment, and a dirty unit is basically a quiet money pit. We see homeowners install a system that is supposed to be high-efficiency, then forget about it until odors or weak airflow force the issue. This guide walks you through every step of a proper clean, from filters to the outdoor unit, so it keeps running the way it did on day one.
Key Takeaways
-
You'll want to turn off your mini split system at the breaker and wait 5–10 minutes before any cleaning starts. Never rely on the remote alone.
-
Clean the indoor air filters every 4–8 weeks and do a deeper cleaning of the coil and blower wheel about once a year.
-
Follow this order: open the wall cassette, remove and wash the filters, clean the indoor coil, clean the blower wheel, then clean the outdoor unit.
-
If you find heavy mold on the blower wheel, a strong odor that won't go away, or water leaks inside the home, stop your DIY work and call a qualified HVAC technician.
-
Cleaning is fair game for homeowners, but any refrigerant work on a mini split system needs EPA Section 608 Type II certification in the United States.
Why Cleaning Your Mini Split Matters
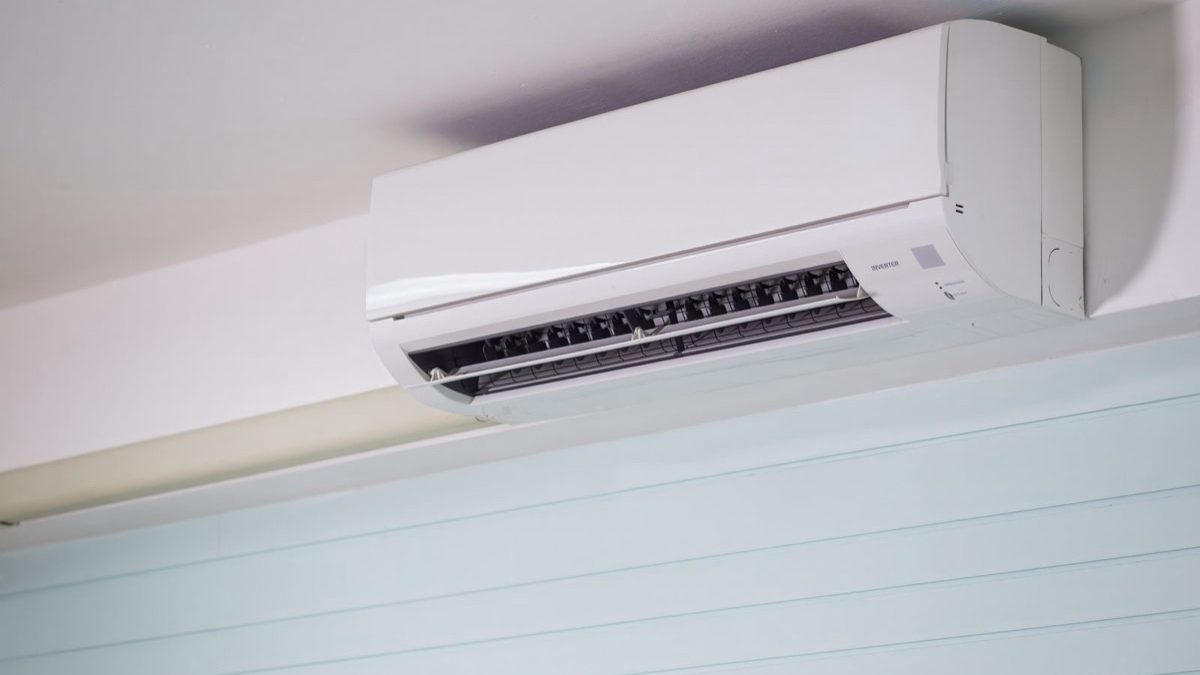
A ductless mini split system has an evaporator coil, blower wheel, drain pan and filters in a compact air handler that is mounted on your wall. That compact design means dust, pet hair and cooking grease build up on every surface faster than anybody thinks. Mini splits should be cleaned at least once a year so they keep performing well.
Here is the idea in plain terms: dirty filters and coils force the compressor and fan to work harder. Neglecting maintenance can lead to reduced airflow and increased energy use, and routine cleaning of air filters alone prevents up to 30% efficiency loss. Clogged filters can shorten the life of the system, while dirty coils can shorten the lifespan of mini split units overall. Coils can house bacteria, mold and mildew, and dust buildup can cause musty odors and reduce airflow in mini split systems.
For DIY-friendly systems with pre-charged line sets, cleaning is one of the few maintenance tasks you are clearly expected to handle. The best thing you can do is learn to recognize the warning signs: lower airflow, uneven temperatures in bedrooms, musty "dirty sock" odors, and visible dust on the indoor unit's vents. Routine maintenance gives you better air quality and efficiency, and proper maintenance can extend the lifespan of mini split units by years.
Power Down and Protect the Area First
Do not skip this step. Wall-mounted mini splits combine electricity, water and sometimes cleaning chemicals in a tight location, so safety comes first. Standard HVAC guidelines are essential for cleaning mini split systems.
-
You'll want to turn off the mini split system with the remote, then switch off the dedicated breaker in the electrical panel. Wait at least 5–10 minutes for capacitors to discharge and the fan to stop completely.
-
Electrical components need protection during the cleaning process. Never spray water or chemicals near the control board.
-
Put a drop cloth or old towels under the indoor unit to catch drips. Professionals often use a purpose-made mini split cleaning bib that goes around the indoor head to catch water. You can mimic this with a taped-up plastic sheet and a bucket underneath.
This article covers surface cleaning only: no opening the sealed refrigeration circuit, no loosening flare nuts and no touching anything involving refrigerant pressures.
Step 1: Open the Unit and Clean the Filters
A mini split clean always begins with the easy win: the reusable mesh filters inside the wall-mounted indoor head. Check filters monthly to determine cleaning frequency, and plan on routine DIY maintenance every 2 to 4 weeks during heavy-use months like summer.
-
Gently lift the front cover from the bottom edge with two hands until it clicks open. Avoid forcing brittle plastic on older mini split units.
-
Most splits use one or two long, plastic-framed mesh filters that sit in shallow tracks above the indoor coil. You'll want to remove air filters by pushing up and out gently.
-
Rinse under lukewarm tap water, or vacuum with a soft brush attachment for light dust. Clean filters using a gentle spray or vacuum with a brush. A mini split's filters should be washed gently to avoid damage-hot water and hard scrubbing can tear or warp the mesh.
-
Dry completely before reinstalling. Let them air dry for at least 30–60 minutes on a clean towel. Never reinstall damp filters. That's an easy path to mold.
-
Reinstall dry filters securely before turning the system back on.
Step 2: Clean the Coil and Blower Wheel
After the filters, the next most important surfaces are the evaporator coil fins and the cylindrical blower wheel that sits just behind the louvers. This is where the real dirt hides, and where cleaning coils prevents odors and improves efficiency. You'll want to inspect and clean the vanes and louvers every 3 to 6 months as well.
-
Coil inspection: If the coil just looks dusty, a soft brush and vacuum is enough. If you see greasy residue or light biofilm, reach for a no-rinse foaming coil cleaner made for indoor evaporators. Spray coil cleaners simplify the cleaning process considerably.
-
Application: Spray evenly across the front face of the indoor coil, keeping the nozzle parallel to the fins to avoid bending them. Let the foam dwell per the product label.
-
Drain check: As the foam breaks down, it should drip into the drain pan and condensate line. Watch for obvious leaks on the wall-a sign of a clogged drain. Inspecting the condensate drain prevents clogs and potential water damage.
-
Blower wheel: With the unit still off, angle a flashlight into the outlet, rotate the wheel by hand, and spray a light disinfecting cleaner formulated for HVAC systems while using a small, soft brush on the blower fins where you can reach them.
A blower wheel covered in thick, fuzzy mold or mildew is a red flag. That job usually means disconnecting wiring and working around the drain pan-call a pro for that challenge.
Step 3: Rinse, Reassemble and Test the Head
Many no-rinse coil cleaners do not need a separate water rinse, but some pump-sprayed detergents do. Follow the specific product label. With a rinse, you'll want to use a low-pressure pump sprayer and direct water at the coil so runoff flows into the drain pan-not over the back of the unit or the wall. Never use high pressure inside.
Wipe the plastic housing and louvers with a damp microfiber cloth and a mild cleaner. Avoid chemicals that leave a strong odor in the room. Reinstall the fully dried air filters, close the front cover until it clicks, and remove any temporary plastic sheet or cleaning bag.
Restore power at the breaker, wait a minute, then start the mini split in cooling or fan-only mode. Let it run 20–30 minutes and check for normal airflow, quieter operation and no unusual dripping. This step quickly confirms the job is done right.
Step 4: Clean the Outdoor Unit
Outdoor mini split units pull in a lot of yard debris, leaves and cottonwood fluff. All of that can clog the condenser coils and reduce cooling and heating efficiency.
-
Shut off power at the outdoor disconnect or main breaker. Wait for the fan blades to fully stop.
-
Remove loose debris with a brush or gloved hands. Use a shop vacuum with a soft brush to pull dust and grass clippings from the intake grille.
-
Rinse with a standard garden hose-no aggressive nozzle. Spray from the inside outward if you can reach it. Avoid aggressive pressure washing to protect delicate components of mini splits.
-
If you use an outdoor coil foam cleaner, apply it per the can directions, allow dwell time, then rinse thoroughly so no residue dries on the coil surface.
-
Keeping a clear perimeter around the outdoor unit ensures proper airflow. Trim shrubs and move stored items so there is at least 12–24 inches of open space on every side.
How Often to Clean a Mini Split and When to Call a Pro
Here is the simple schedule we recommend for most homes:
| Task | Frequency |
|---|---|
| Filter check and cleaning | Every 4–8 weeks (every 2–4 weeks with pets or heavy cooking) |
| Louver and vane wipe-down | Every 3–6 months |
| Indoor coil and blower wheel deep clean | Once a year |
| Outdoor coil rinse and debris removal | Every spring and fall |
| Professional servicing | Once a year for comprehensive checks |
Deep cleaning of mini splits should occur annually. Homes with pets, smokers, or heavy cooking in the kitchen will need more frequent sessions because hair, dander, and airborne grease load the filters and coil faster. Regular maintenance can prevent issues with flare fittings and seals over the life of the system.
If you notice recurring leaks, stubborn odors after cleaning, icing on the indoor coil, or error codes on the display, stop DIY work and call a licensed HVAC technician. Tasks like checking refrigerant pressures or handling R-410A or R-32 refrigerant fall under EPA Section 608 Type II certification requirements. There are four 608 certification types: Type I for small appliances, Type II for high-pressure appliances such as residential split systems, Type III for low-pressure and Universal covering all three. Anybody not comfortable working around electrical disconnects or high ladders should pay a pro to handle the job.
FAQ
FAQ
Specifications, pricing, and warranty terms in this guide are manufacturer-published as of October 2026 and are subject to change — verify current details and your model's installation manual before purchase. Brand names are trademarks of their respective owners.
Keep Reading
Related Guides
Best DIY Heat Pump Mini Splits 2026
Top 3 DIY heat pump brands ranked on cold-climate heating, warranty, and true DIY install.
See the picks →Best Mini Split AC Units in 2026
Our full ranking of the top mini split systems — efficiency, cold-climate performance, and warranty.
See the rankings →Pre-Charged Line Sets Explained
How the quick-connect, no-vacuum hookup actually works — routing, compatibility, and the torque step that matters most.
Read the guide →Best DIY Mini Split Air Conditioner
Our 2026 picks for the best DIY mini split AC — sizing, install steps, and cost.
Read the guide →