Do You Need a Vacuum Pump for a Pioneer Precharged Line Set?

Here's what you need to know at a glance:

  • Standard Pioneer mini splits ship with bare, uncharged copper line sets that are pre-flared and pre-insulated but open to the atmosphere. A vacuum pump, micron gauge, and manifold gauges are required before the system can operate.
  • Pre-charged mini splits from other brands (like Zone Air or MRCOOL) do not require a vacuum pump because the refrigerant is sealed inside the line set at the factory, keeping the circuit closed during the entire DIY install.
  • True pre-charged line sets arrive sealed with refrigerant and air removed — they connect between indoor and outdoor units without ever exposing the circuit to moisture or other non-condensable gases.
  • Pioneer does sell a Kwik-E-Vac line set flushing kit as an alternative to a vacuum pump, but it is a flushing method, not a no-vacuum pre-charged system (more on that below).

The decision ultimately hinges on which kit you buy: a standard Pioneer copper line set means vacuum required; a true quick connect system from a DIY mini split brand means no vacuum needed.

Standard Pioneer (flare + vacuum)Pioneer Kwik-E-Vac flushTrue pre-charged quick connect
Line set as shippedPre-flared, pre-insulated, open to airSame open Pioneer line setSealed and charged at the factory
Air & moisture removalDeep vacuum to 500 microns or belowPulsed flush from a single-use canister; no micron readingNone needed — circuit never opens
Refrigerant toolsVacuum pump, micron gauge, manifold gauges, torque wrenchFlushing kit (one per line set) plus torque wrenchTorque wrench only
EPA 608 exposureHandling refrigerant in an open circuitCircuit is still opened in the fieldNone — sealed system
Typical refrigerant-side time1–2 hours incl. vacuum holdUnder an hourMinutes per connection

Understanding Pioneer Mini Splits: Standard vs Pre-Charged Options

Pioneer sells a range of mini split systems — from the Diamante Pro to the WYS series — but their installation requirements share a common thread. Understanding whether your model is a traditional flare system or something else determines your entire tool list.

  • Pioneer's standard mini splits use uncharged copper line sets. The installer routes the pre-flared line set (Pioneer's kits are sold in fixed lengths and are not meant to be cut shorter without re-flaring), connects pre-flared fittings to the indoor unit and outdoor unit, then must pull a deep vacuum before opening the service valves on the condenser.
  • The outdoor condenser of Pioneer mini splits is factory charged with refrigerant — enough for up to 25 feet of line set on current models. However, this charge stays sealed in the outdoor unit until the vacuum is complete and the valves are opened.
  • Pioneer does not currently manufacture or endorse any pre-charged line set or quick connect install kit under its own brand. Its official help center states: “No, we do not offer pre-charged line sets, as they have been proven unreliable due to the nature of the spring fittings used.” The same page adds that pre-charged line sets “cannot be shortened” and points buyers to dehydrated line sets plus its flushing kit instead.
  • Most others in the traditional mini split market follow the same pattern: bare copper, field flaring, vacuum, then charge release.
  • If you want a pre-charged DIY mini split experience with Pioneer equipment, you'd need a compatible third-party pre-charged line set — which introduces warranty and compatibility risks.

For the full picture on Pioneer's lineup, efficiency, and owner reports beyond the install question, see our Pioneer DIY mini split review.

What Is a Pre-Charged (Precharged) Line Set on a Mini Split?

A pre-charged line set is a pair of copper tubes (liquid and suction) that come factory-filled with the correct refrigerant amount and sealed. When you connect them, the refrigerant circuit stays closed from factory to final install.

  • Pre-charged line sets contain sealed refrigerant from the factory, matched to the outdoor unit's refrigerant type — whether R-410A, R-32, or the newer R-454B.
  • True pre-charged line sets allow for installation without handling refrigerant directly. You torque the quick connect fittings, and the valve mechanism releases refrigerant only after the connection is secure.
  • A pre-vacuumed line set is different: it's been evacuated at the factory but holds no refrigerant inside the tubing. The charge stays entirely in the outdoor unit. These still need careful handling to avoid introducing air during connection.
  • Pre-charged systems are factory-sealed and charged with refrigerant, making them ready for installation without a vacuum pump, nitrogen purge, or manifold gauges.
  • Pioneer kits ship with open copper coils that are neither pre-vacuumed nor pre-charged. The fitting ends are capped for shipping, but they are not sealed under vacuum — meaning field evacuation is unavoidable.

Our best pre-charged DIY mini split comparison covers which brands actually ship a sealed, no-vacuum line set in 2026, and our quick connect mini split guide explains how the fittings themselves work.

Why Standard Pioneer Line Sets Officially Require a Vacuum Pump

Pioneer's installation manuals for standard systems specify that the refrigerant circuit must be properly evacuated before opening the service valves. This isn't optional — it's a structural requirement of how the system works.

  • Air and moisture must be removed before releasing refrigerant into Pioneer systems. Even small amounts of atmospheric air inside the circuit act as non-condensable gases, raising condenser pressure and reducing cooling capacity.
  • Moisture trapped in the line reacts with refrigerant and compressor oil to form acids that corrode compressor windings and internal components over time. Evacuating the system is crucial to prevent contamination from air and moisture.
  • Skipping vacuum on traditional systems can damage the compressor. The non-condensable gases reduce heat exchange efficiency, force the compressor to work harder, and increase power draw.
  • Traditional mini splits require a vacuum pump for installation because the copper line set ships open to the atmosphere. There is no factory seal keeping moisture out during shipping and handling.
  • A “quick crack” or “push purge” — where you briefly open the service valves to blow refrigerant through the line set — is not industry-accepted. It fails to remove moisture, wastes refrigerant, can violate EPA Section 608 venting rules, and can void Pioneer's warranty.

Where Kwik-E-Vac and “No Vacuum” Pioneer Install Videos Fit In

If you've watched DIY Pioneer install videos on YouTube, you've likely seen the Kwik-E-Vac mentioned as a shortcut. Understanding what it actually does — and doesn't do — is critical.

  • Pioneer sells the KWIK-E-VAC Line Set Flushing Kit (SKU IKT-KEV-10-516, about $35 on sale) and markets it as “an alternative to a vacuum pump.” The description Pioneer provides for the Kwik-E tool is essentially a quick purge aimed at homeowners who don't own a full vacuum pump setup.
  • It works by pushing pressurized flushing material from a single-use canister through the gas-side service port in pulses, driving air out of the line set, then connecting the liquid side and releasing the rest. It is one kit per line set — so one per zone on a multi-zone system — and is listed for R-454B, R-32, and R-410A systems.
  • While this method is marketed as no vacuum pump needed, it is not the same as a factory-sealed pre-charged line set. You're still opening the refrigerant circuit in the field, and there is no micron gauge reading to prove the line is dry, unlike a proper deep vacuum pulled to 500 microns or below.
  • Pioneer's own installation manual does not mention it. The current Diamante Pro (WYT-20) installation manual says to “use a vacuum pump and manifold gauge” and lays out a triple evacuation — down to 8,000 microns, break with nitrogen, 5,000 microns, break again, then 500 microns — with the final vacuum held “without movement for a minimum of 4 hours.”
  • It's a head to head trade-off: lower upfront tool cost and faster setup vs. no measurable proof of evacuation, potential moisture remaining in the line, and an argument over “installation following the manual instructions” if you ever file a warranty claim.

The Kwik-E-Vac is a compromise tool — not a replacement for a proper vacuum, and certainly not the same as a pre-charged system where the circuit is never opened at all.

Official vs DIY Reality: What Pioneer Actually Allows (2026)

There's a gap between what Pioneer's manuals require and what many DIY installers attempt every year. Understanding where you fall on that spectrum matters for warranty, safety, and performance.

  • Pioneer's official stance, from its installation manual: “Installation must be completed by trained personnel,” “qualified and well-trained personnel must complete the evacuation,” and electrical connections must be made by a licensed electrician following the NEC. The manual is clear on this point.
  • Refrigerant handling is regulated federally: under EPA Section 608, anyone opening a refrigerant circuit on a non-sealed system is expected to be certified, and local codes may add permit and inspection requirements on top.
  • A homeowner can physically install a Pioneer unit with the right tools and careful study. But doing so shifts all liability and risk to the owner — including warranty coverage if the install doesn't meet Pioneer's documented procedures.
  • Pioneer's warranty covers units “properly installed” following the manual and excludes faulty installation and improper handling during installation. It doesn't say DIY voids coverage outright, but a skipped or undocumented vacuum is exactly the kind of install fault it excludes. Registration matters too: up to 1 year unregistered, up to 5 years registered, and labor is never covered.
  • Only systems shipped with true pre-charged line sets are generally marketed as DIY mini split solutions where no vacuum pump is required. Pioneer does not currently fall into this category.
  • Requirements can differ between Pioneer product lines and model years. Always verify the current installation manual for your specific model number before purchasing tools or committing to a DIY install.

Our DOE and EPA rules explainer covers why a sealed pre-charged system keeps a homeowner install on the right side of refrigerant rules while an open flare system does not.

DIY Install Scenarios: When You Can Skip the Vacuum Pump

There are only a few cases where a vacuum pump is not needed for a Pioneer-related install. Each one depends on the type of line set and connection system you're using.

  • Scenario 1: You are using a true pre-charged line set kit with quick connect fittings specifically designed to match your outdoor unit. The refrigerant is sealed inside the line from factory to final connection. Installation of pre-charged systems typically takes 2–4 hours, and no field vacuum is needed.
  • Scenario 2: You have a pre-vacuumed and sealed line set where the manufacturer has evacuated the tubing at the factory. The outdoor unit holds the entire refrigerant charge until the service valves are opened after connection.
  • Scenario 3: You install a third-party no-vacuum kit that converts a standard flare Pioneer system to a quick connect interface, with all refrigerant sealed until final connection. Some DIYers explore this route, but it is unsupported by Pioneer.

If your Pioneer kit shipped with bare flared copper line sets and open ends, none of these scenarios apply. A vacuum pump is officially required, full stop.

Pre-charged systems can save roughly $1,500–$3,500 per zone in labor compared to hiring a professional for a traditional install with vacuum work, pressure testing, and charge verification.

When a Vacuum Pump Is Absolutely Required for Pioneer Mini Splits

The default assumption for any Pioneer mini split is vacuum required unless the documentation for your specific kit clearly states otherwise.

  • Any time you cut, flare, or braze a copper line set between indoor and outdoor units, you are opening the refrigerant path. Traditional systems can trap moisture and air if improperly installed, and the only way to remove them properly is with a vacuum pump.
  • If your line distance is longer than the included line set and you need to add line or connections, you must vacuum the extended circuit and weigh in extra refrigerant per Pioneer's charge tables.
  • When converting or modifying older Pioneer systems that were originally professionally installed, any rework that opens the refrigerant circuit requires a fresh evacuation.
  • Even if you use the Kwik-E-Vac as a substitute, it still performs a purge of the open line set — just with a different apparatus and without a measurable end point. In the physics sense, it's not truly “no vacuum” either; it's “no proof.”
  • Any professional or inspector-reviewed installation of a non-precharged Pioneer system expects a proper vacuum pump and a micron gauge reading below 500 microns, held long enough to prove the system is dry and leak-free (commonly at least 10 minutes).

Line Set Length, Custom Runs, and Performance: Getting It Right

The distance between your indoor and outdoor unit has a direct impact on refrigerant charge, system efficiency, and installation complexity. Getting the line set length right is one of the most underrated factors in a successful install.

  • Pioneer sells its copper piping kits in fixed lengths — 10, 16, 25, 33, and 50 feet — and the Diamante Pro 12K system itself is sold only with the 16 ft kit. If your actual run is 40 feet, you're coiling 10 feet of excess copper from a 50 ft kit behind the outdoor unit. That extra length creates unnecessary pressure drop and can cause oil return issues, and anything past 25 ft needs extra refrigerant weighed in (about 0.11 oz per foot of R-454B on the Diamante Pro).
  • If your run is 60 feet with a Pioneer system, you'd need to join line sets together, doubling your flare joints. Each additional joint is a potential leak point, especially in a DIY install where torque wrench calibration may be off.
  • Zone Air sells custom-cut single-run pre-charged line sets from 8 to 75 feet, with one pair of quick connect fittings at the length you need — no coiling or joining.
  • A single pre-measured line set has two connection points; a chained setup has four or more, and each one is a potential leak point.
  • Matching line set length closely to the actual indoor-to-outdoor distance improves refrigerant distribution, reduces compressor workload, and simplifies routing through walls and ceilings.

For comparison, MRCOOL DIY pre-charged line sets come in fixed 16, 25, 35, and 50 ft lengths with coupler kits to a 75 ft maximum — our MRCOOL line set guide maps every combination.

Pioneer vs Modern Pre-Charged DIY Systems: Head to Head

Let's put a typical Pioneer traditional mini split next to modern pre-charged DIY systems and compare what actually matters: installation complexity, efficiency, line set design, and cost.

Pioneer (standard)Zone AirMRCOOL DIY 5th Gen
Line setFlare, pre-flared; 10/16/25/33/50 ft kitsPre-charged, single run cut to length, one pair of quick connectsPre-charged, fixed 16/25/35/50 ft, couplers to 75 ft
Vacuum pumpRequiredNot requiredNot required
SEER2About 17–25 depending on seriesUp to 24 (230V); 23 at 115VUp to 23.6
Multi-zone headsWall, cassette, ducted (flare)Wall, cassette, concealed ducted on one condenserWall + OuttaSight cassette; ducted via separate hybrid air handler
12K priceDiamante Pro ~$858 (230V) / ~$888 (115V) sale$1,999.99 (115V) / $2,049.99 (230V)~$2,359 (115V, retail)
WarrantyUp to 1 yr unregistered / up to 5 yr registered; no labor5 yr parts / 7 yr compressor5 yr parts / 7 yr compressor, no registration required

Installation complexity. Pioneer standard systems need a vacuum pump, manifold gauges, a micron gauge, a torque wrench, and often an EPA-certified HVAC tech. A pre-charged system like Zone Air or MRCOOL DIY ships with sealed line sets and requires no vacuum, no gauges, and no refrigerant handling. Zone Air's 9K and 12K models also run on 115V and accept an optional cord kit for a plug-in connection where local code permits — see our 120V / 115V DIY mini split comparison for how that stacks up.

Line set design. Pioneer's fixed lengths force coiling or joining. Zone Air's custom-cut 8–75 ft pre-charged runs come with a single pair of quick connect valves. MRCOOL's DIY multi-zone pairs wall heads with its OuttaSight ceiling cassette, with ducted coverage coming from a separate whole-home DIY Hybrid Air Handler, while Zone Air supports mix-and-match configurations — wall, cassette, and concealed ducted on a single condenser.

Efficiency. Zone Air reaches up to 24 SEER2 on its 230V single-zone models (its 115V models are 23 SEER2). MRCOOL DIY models reach up to 23.6 SEER2. Pioneer spans about 17–25 SEER2 depending on series: the Diamante Pro 12K is rated 20 SEER2, while the flare-type Quantum Hyperformance reaches up to 25. Cold-climate heating matters too: Zone Air and standard MRCOOL DIY models are both rated to operate down to −13°F, and MRCOOL's DIY Hyper Heat and Pioneer's Quantum line reach −22°F. Over a system's lifetime, a one- or two-point SEER2 difference is worth a few percent of your cooling bill each year. For third-party sentiment, MRCOOL's Trustpilot profile shows 3.2 out of 5 across 89 reviews (September 2026); Zone Air's own published reviews average roughly 4.8 out of 5 across 150+ verified buyers — first-party numbers, so weigh them accordingly.

Warranty. Pioneer's warranty page offers up to 1 year of coverage unregistered and up to 5 years registered (registration within one week of proper installation per the policy page), with labor excluded and coverage conditioned on an installation that follows the manual — including its evacuation procedure. Perfect Aire's current quick connect line carries a 7-year parts and compressor warranty. Zone Air and MRCOOL DIY both cover 5 years parts and 7 years compressor, and neither requires registration to keep that coverage on a DIY install.

Price. Pioneer's 12,000 BTU Diamante Pro is on sale for about $858 (230V) or $888 (115V), while a comparable Zone Air unit runs $1,999.99 (115V) or $2,049.99 (230V). But factor in hiring an HVAC tech for vacuum work ($300–800), purchasing or renting equipment ($200–400), and the potential for a return visit if leaks develop — and Pioneer's cost advantage shrinks. Among the pre-charged options, Zone Air's 12K 115V system lists about 15% below the ~$2,359 retail price of the comparable MRCOOL DIY 12K. If you already own a vacuum pump and micron gauge, or have an HVAC tech lined up anyway, Pioneer's lower equipment price is hard to beat.
Tools and Skills Checklist for a Pioneer DIY Mini Split Install

Even with pre-charged line sets, roughly 80–90% of the work — mounting brackets, running wiring, drilling holes, routing drainage — is identical across brands. The difference is in the refrigerant circuit step.

Standard Pioneer install (flare + vacuum) requires:

  • Vacuum pump (two-stage, 4+ CFM recommended)
  • Micron gauge (digital, not just a compound gauge)
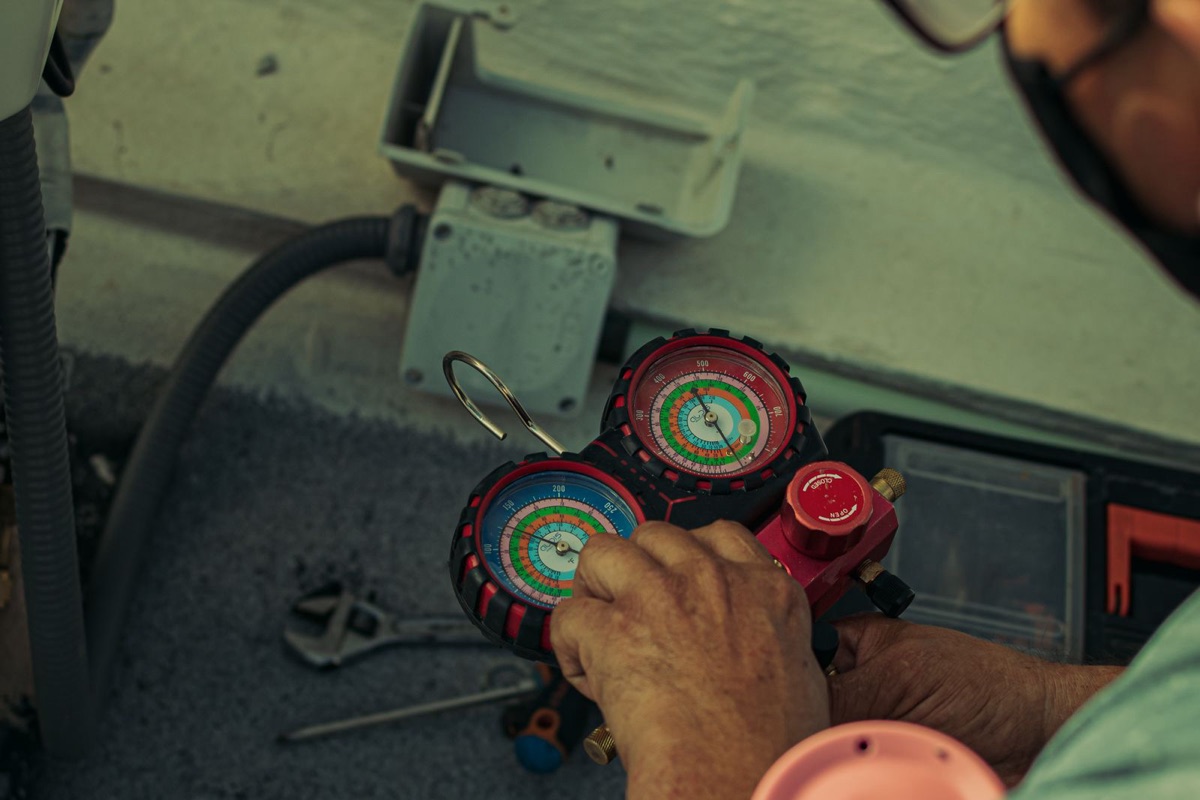
  • Manifold gauges for monitoring pressure during evacuation
  • Torque wrench (with correct crow-foot adapters for flare nuts)
  • Flaring tool (eccentric or block-style) if you cut or re-flare any line
  • Nitrogen tank and regulator (for pressure testing and brazing)
  • Refrigerant scale (if adding charge beyond the factory amount)

Pre-charged or quick connect DIY install requires:

  • Drill and hole saw (3-inch minimum for the line set pass-through)
  • Level and measuring tape
  • Basic hand tools (screwdrivers, adjustable wrenches)
  • Torque wrench (for quick connect fittings — hand tighten first, then torque to spec)
  • Wire strippers and electrical testers

Skills you need either way:

  • Comfortable using electrical testers and following wiring diagrams
  • Ability to properly support and secure line sets along their run
  • Understanding of condensate drain slope and routing
  • Willingness to read the full installation manual — not just watch a half-hour YouTube summary

Lack of a vacuum pump alone is not enough reason to skip professional help. If you're tackling a multi-zone Pioneer install with long runs and complex routing, the refrigerant handling is only one piece of the puzzle. Our step-by-step DIY mini split installation guide walks through everything else.

Common Mistakes When Installing Pioneer Mini Splits Without a Vacuum

Many of the performance issues and early failures reported in online forums trace back to skipping or mishandling the evacuation step. Here are the most common errors.

  1. Using a pre-charged line set not properly matched to the outdoor unit's refrigerant type or capacity. Mismatched refrigerant or an incorrect refrigerant amount leads to poor performance, potential compressor damage, and safety hazards. Always verify compatibility before connecting anything.
  2. Assuming a factory-flared Pioneer copper line set is pre-vacuumed when it actually shipped open and full of air and moisture. Pioneer's pre-flared lines are a convenience for fitting — they are not sealed or evacuated.
  3. Over-tightening or under-tightening flare connections when no torque wrench is used. A fine line separates a snug seal from a cracked fitting. Under-torqued connections cause slow leaks that may take months to become noticeable.
  4. Extending fixed Pioneer line sets beyond recommended lengths without recalculating the charge or pulling a new vacuum. Every additional foot of line beyond the factory-charged length requires additional refrigerant, and every new joint is a leak risk.
  5. Following outdated “no vacuum” tricks from forums that Pioneer does not endorse. These shortcuts — like cracking the valve to purge air — leave moisture behind, release refrigerant, and risk long-term compressor failure.

FAQ: Pioneer Mini Split Precharged Line Sets and Vacuum Pumps

Does Pioneer sell a true no-vacuum, pre-charged DIY mini split in 2026? No. As of 2026, Pioneer does not offer pre-charged line sets or a true quick connect system designed for no-vacuum installation. Pioneer mini split systems use standard uncharged copper line sets, and their manuals require evacuation before commissioning. Pioneer says it does not offer pre-charged line sets because the spring fittings they use have proven unreliable, and notes they cannot be shortened.
Can I use a third-party pre-charged line set with a Pioneer outdoor unit? Theoretically, yes — if the refrigerant type, line diameter, and capacity ratings match. However, this approach is unsupported by Pioneer and puts your warranty at risk, since coverage depends on an installation that follows Pioneer's manual. You'd also need to verify that the fitting interface is compatible and that the pre-measured length matches your indoor-to-outdoor distance. Proceed at your own risk.
What happens if the Pioneer line set is longer than the standard charge covers? Pioneer's factory charge covers up to 25 feet of line on current models. Beyond that, you add refrigerant per the manufacturer's charge table — about 0.11 oz per extra foot of R-454B on the Diamante Pro. Any extension also means additional flare joints, each requiring proper torque, and a full vacuum of the entire extended circuit. A vacuum pump becomes even more critical with longer runs because there's more internal surface area collecting moisture.
Is Kwik-E-Vac officially approved by Pioneer as a replacement for a vacuum pump? Pioneer sells the Kwik-E-Vac line set flushing kit and markets it as an alternative to a vacuum pump, so it is a Pioneer product. But the current Diamante Pro installation manual doesn't mention it and instead specifies a vacuum pump, manifold gauge, and triple evacuation to 500 microns held for at least 4 hours. The kit is faster and cheaper, but it gives you no micron reading to prove the line is dry, which is the trade-off to weigh.
How does Pioneer compare to modern DIY-first brands if I have no HVAC tools? If you don't own a vacuum pump, manifold gauges, a flaring tool, or a micron gauge — and you don't want to hire an HVAC tech — Pioneer is a difficult path. Pre-charged DIY brands such as Zone Air and MRCOOL DIY ship factory-sealed line sets with quick connect fittings, eliminating the need for refrigerant handling tools (Zone Air cuts its line sets to length; MRCOOL uses fixed lengths with couplers). For most homeowners without HVAC experience, a pre-charged system is the simpler route; if you already own the tools or have a tech lined up, Pioneer costs far less up front.
What's the short version? Standard Pioneer = vacuum pump required, always — and Pioneer's own manual asks for a triple evacuation, not a shortcut. Pre-charged systems such as Zone Air and MRCOOL DIY = no vacuum, sealed refrigerant, DIY-friendly. Pioneer = lower equipment price, but plan on the tools or a technician for evacuation.

Specifications, pricing, and warranty terms in this guide are manufacturer-published as of September 2026 and are subject to change — verify current details and your model's installation manual before purchase. Pioneer® and MRCOOL® are trademarks of their respective owners; Best DIY Mini Split Brands is an independent review site and is not affiliated with, endorsed by, or sponsored by any brand covered here.

Who Wrote This Guide

John Osborne

Editor-in-Chief, Best DIY Mini Split Brands

Published September 17, 2026 · Updated September 25, 2026

John Osborne is the Editor-in-Chief of Best DIY Mini Split Brands and reviews every guide we publish. Our team are homeowners who've installed pre-charged ductless systems in our own additions, garages, and bonus rooms — not contractors selling a service. Our guides draw on hands-on install experience, official manufacturer documentation, and product testing data to give you straight answers.

Rather Skip the Vacuum Pump Entirely?

Compare the true pre-charged DIY brands side-by-side, or start with the step-by-step installation guide.